动态围墙(简易版) · dynamicWall Simple · ▶ 在线运行案例
案例合集: 三维可视化功能案例(threehub.cn)
开源仓库github地址: https://github.com/z2586300277/three-cesium-examples
**400个案例代码: ** 网盘链接
你将学到什么
- Scene / Camera / Renderer 标准渲染管线搭建
- 案例完整源码结构与可复用初始化模板
效果说明
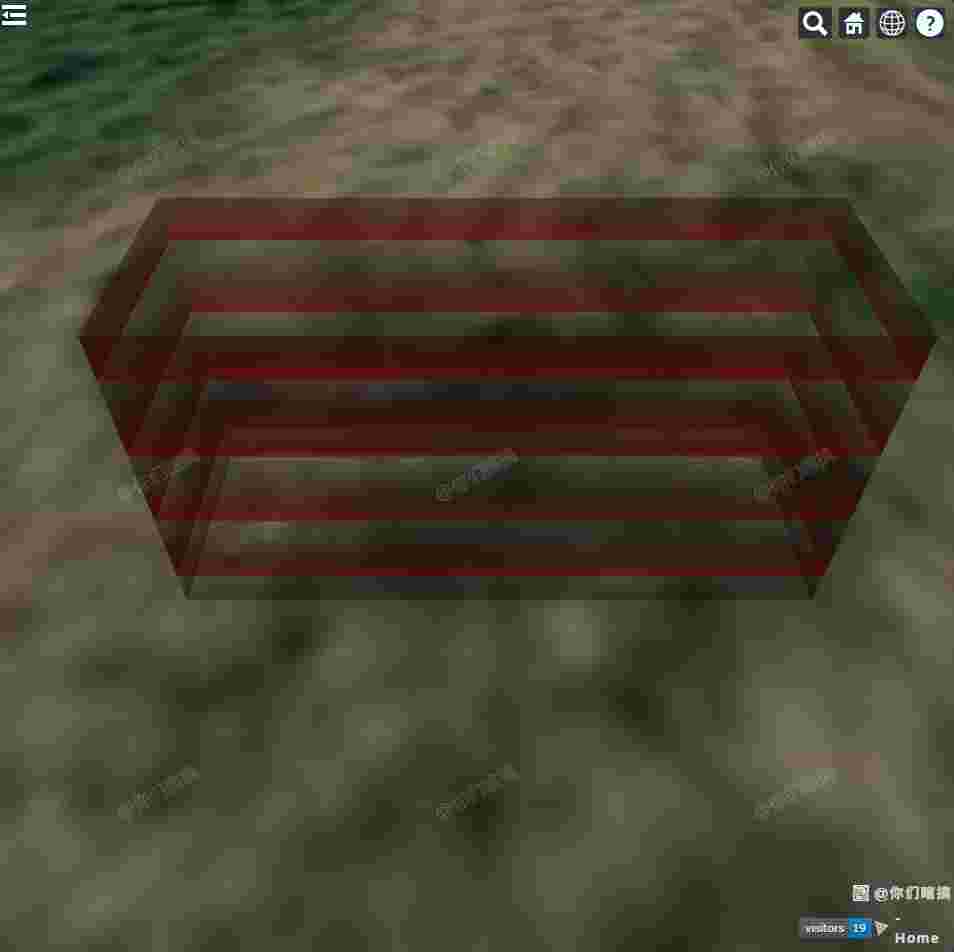
本案例演示 动态围墙(简易版) 效果:创建动态围墙效果。建议先打开文首在线案例查看动态画面,再对照下方源码逐步理解。
核心概念
- Viewer 聚合 Scene、Camera、Clock 与渲染循环,是 Cesium 应用入口。
- 阅读下方完整源码时,建议从
init/load/animate三条主线入手,再深入 shader 与工具函数。
实现步骤
- 创建 Viewer,配置地形/影像(若案例需要)并设置初始相机
- 在
requestAnimationFrame循环中更新状态并 render(Cesium 为viewer.render或自动渲染)
代码要点
import * as Cesium from 'cesium'

// 获取Cesium容器元素
const box = document.getElementById('box')

// 初始化Cesium Viewer
const viewer = new Cesium.Viewer(box, {
    // 禁用动画控件(左下角仪表)
    animation: false,
    // 禁用图层选择器(右上角图层选择按钮)
    baseLayerPicker: false,
    // 设置基础影像图层为ArcGIS影像服务
    baseLayer: Cesium.ImageryLayer.fromProviderAsync(Cesium.ArcGisMapServerImageryProvider.fromUrl('https://server.arcgisonline.com/arcgis/rest/services/World_Imagery/MapServer')),
    // 禁用全屏按钮(右下角全屏选择按钮)
    fullscreenButton: false,
    // 禁用时间轴控件
    timeline: false,
    // 禁用信息框
    infoBox: false,
})

// 启用地形深度检测,使墙体能够贴合地形
viewer.scene.globe.depthTestAgainstTerrain = true
// 隐藏Cesium Logo
viewer._cesiumWidget._creditContainer.style.display = "none";
// 定义围墙的经纬度坐标和高度数据
const positions = [
    115.6434, 28.76762,
    115.6432, 28.76762,
    115.6432, 28.76756,
    115.6434, 28.76756,
    115.6434, 28.76762,
]

// 设置相机视角,定位到围墙位置
viewer.camera.setView({
    // 相机目标位置(经度、纬度、高度)
    destination: Cesium.Cartesian3.fromDegrees(115.6433, 28.7674, 30),
    orientation: {
        // 偏航角(朝向),正北为0度
        heading: Cesium.Math.toRadians(0),
        // 俯仰角,-90度为垂直向下看
        pitch: Cesium.Math.toRadians(-45),
        // 翻滚角,0为不翻滚
        roll: 0
    }
})
// 调用函数创建动态围墙
addWalls(positions, 10)
/**
 * 创建动态围墙效果
 * @param {Array<Array<number>>} positionLonLat - 围墙顶点的经纬度坐标数组
 * @param {number} height - 围墙的高度
 */
function addWalls(positionLonLat, height) {

    // 自定义着色器代码,实现动态流动效果
    const mySource = `
        czm_material czm_getMaterial(czm_materialInput materialInput)
        {
            czm_material material = czm_getDefaultMaterial(materialInput);
            vec2 st = materialInput.st;
            // 通过时间变量czm_frameNumber实现动态流动效果
            vec4 colorImage = texture(image, vec2(fract(st.t * rep - speed * czm_frameNumber * 0.005), st.t * rep));
            material.alpha = colorImage.a * color.a;
            material.diffuse = colorImage.rgb;
            return material;
        }
    `
    // 创建围墙几何体实例
    const wallInstance = new Cesium.GeometryInstance({
        geometry: new Cesium.WallGeometry({
            // 将经纬度坐标数组转换为笛卡尔坐标
            positions: Cesium.Cartesian3.fromDegreesArray(positionLonLat),
            // 围墙顶部高度数组,所有顶点使用相同的最大高度值
            maximumHeights: new Array(positionLonLat.length / 2).fill(height),
            // 围墙底部高度数组,所有顶点使用相同的最小高度值
            minimumHeights: new Array(positionLonLat.length / 2).fill(0),
        }),
    })

    // 创建围墙材质外观
    const wallAppearance = new Cesium.MaterialAppearance({
        material: new Cesium.Material({
            fabric: {
                // 材质参数配置
                uniforms: {
                    // 围墙颜色设置为橙红色
                    color: new Cesium.Color.fromCssColorString("rgba(238, 85, 34, 1)"),
                    // 流动效果使用的纹理图片路径
                    image: HOST + "files/images/colors.png",
                    // 动画流动速度
                    speed: 3,
                    // 纹理重复次数
                    rep: 4,
                },
                // 使用自定义着色器代码
                source: mySource,
            },
        }),
    })

    // 创建围墙图元对象
    const primitive = new Cesium.Primitive({
        // 关联几何体实例
        geometryInstances: wallInstance,
        // 设置外观材质
        appearance: wallAppearance,
        // 保留几何体实例数据,以便后续可能的重用
        releaseGeometryInstances: false,
    })

    // 将围墙添加到场景中
    viewer.scene.primitives.add(primitive)
}
完整源码:GitHub
小结
- 本文提供 动态围墙(简易版) 完整 Cesium.js 源码与在线 Demo,建议先运行案例再改 uniform/参数做二次实验
- 更多 Cesium.js 实战案例见 three-cesium-examples 合集 与 GitHub 开源仓库