天空盒 · Sky And Env · ▶ 在线运行案例
案例合集: 三维可视化功能案例(threehub.cn)
开源仓库github地址: https://github.com/z2586300277/three-cesium-examples
**400个案例代码: ** 网盘链接
你将学到什么
- CubeTexture 六面体天空盒的加载与贴图顺序
scene.background与material.envMap的 分工- PBR 材质
metalness / roughness如何影响环境反射 - 天空盒 不等同于 在场景里放一个 Box 网格
效果说明
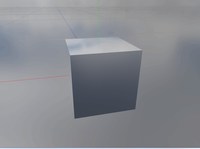
场景背景是一圈 全景天空(六张 PNG 拼成的立方体环境),中央有一个 高反光金属立方体,表面映出天空颜色。拖动 OrbitControls 时,背景随相机旋转,立方体反射也会变化。
核心概念
天空盒是什么?
天空盒不是场景里的一个大盒子模型,而是 无穷远处的背景:相机始终在立方体内部,六面贴图永远「包住」整个场景。
         +Y (top)
          │
    ┌─────┼─────┐
    │     │     │
 -X ┼─────O─────+X   ← 相机在中心,看六面内壁
    │     │     │
    └─────┼─────┘
         -Y (bottom)
          +Z / -Z 为前后
CubeTextureLoader 贴图顺序
Three.js 要求 6 张图按固定顺序 传入(与 OpenGL 立方体贴图一致):
| 索引 | 面 |
|---|---|
| 0 | +X (右) |
| 1 | -X (左) |
| 2 | +Y (上) |
| 3 | -Y (下) |
| 4 | +Z (前) |
| 5 | -Z (后) |
const urls = [1, 2, 3, 4, 5, 6].map(i => basePath + i + '.png');
const textureCube = new THREE.CubeTextureLoader().load(urls);
贴图顺序错了会出现「接缝错位、天空拼接混乱」——这是天空盒最常见的问题。
background vs envMap vs environment
| 属性 | 作用对象 | 本案例 |
|---|---|---|
scene.background = cubeTexture |
相机看到的远景背景 | ✅ 已设置 |
material.envMap = cubeTexture |
单个材质 的反射/折射采样 | ✅ 立方体材质 |
scene.environment = cubeTexture |
场景内 所有 PBR 材质 的 IBL 环境光 | ❌ 未设置 |
本案例只给立方体设置了 envMap,未设 scene.environment,也未加 DirectionalLight / AmbientLight。立方体靠 高 metalness + 低 roughness 几乎变成「环境镜」,主要显示 envMap 反射,所以仍然可见。
::: tip 现代推荐写法 加载 cubemap 后通常同时写:
scene.background = textureCube;
scene.environment = textureCube;  // 所有 MeshStandardMaterial 自动 IBL
不必每个材质手动 envMap = textureCube。
:::
PBR 参数在本案例中的含义
new THREE.MeshStandardMaterial({
  color: 0xffffff,
  envMap: textureCube,
  metalness: 1,    // 完全金属 → 反射为主
  roughness: 0,    // 完全光滑 → 清晰倒影
});
| 参数 | 值 | 视觉效果 |
|---|---|---|
metalness: 1 |
纯金属 | 颜色主要来自反射而非漫反射 |
roughness: 0 |
镜面 | 反射清晰,像抛光金属 |
roughness: 0.5 |
可尝试 | 反射变模糊,更像磨砂金属 |
实现步骤
- Scene / Camera / Renderer / OrbitControls + rAF(与 创建场景 相同骨架)
CubeTextureLoader.load(urls)加载六面 PNGscene.background = textureCube设背景天空- 创建立方体
MeshStandardMaterial,envMap: textureCube scene.add(boxMesh),无额外光源
代码要点
import * as THREE from 'three'
import { OrbitControls } from 'three/examples/jsm/controls/OrbitControls.js'

const box = document.getElementById('box')

const scene = new THREE.Scene()

const camera = new THREE.PerspectiveCamera(50, box.clientWidth / box.clientHeight, 0.1, 1000)

camera.position.set(0, 10, 10)

const renderer = new THREE.WebGLRenderer({ antialias: true, alpha: true, logarithmicDepthBuffer: true })

renderer.setSize(box.clientWidth, box.clientHeight)

box.appendChild(renderer.domElement)

const controls = new OrbitControls(camera, renderer.domElement)

controls.enableDamping = true

animate()

function animate() {

  requestAnimationFrame(animate)

  controls.update()

  renderer.render(scene, camera)

}

window.onresize = () => {

  renderer.setSize(box.clientWidth, box.clientHeight)

  camera.aspect = box.clientWidth / box.clientHeight

  camera.updateProjectionMatrix()

}

// 文件地址
const urls = [0, 1, 2, 3, 4, 5].map(k => (FILE_HOST + 'files/sky/skyBox0/' + (k + 1) + '.png'));

const textureCube = new THREE.CubeTextureLoader().load(urls);

scene.background = textureCube;

// 环境贴图
const boxGeometry = new THREE.BoxGeometry(10, 10, 10);

const boxMaterial = new THREE.MeshStandardMaterial({ color: 0xffffff, envMap: textureCube, metalness: 1, roughness: 0 });

const boxMesh = new THREE.Mesh(boxGeometry, boxMaterial);

scene.add(boxMesh);
完整源码:GitHub