帧率 · Frame Rate & Stats · ▶ 在线运行案例
案例合集: 三维可视化功能案例(threehub.cn)
开源仓库github地址: https://github.com/z2586300277/three-cesium-examples
**400个案例代码: ** 网盘链接
你将学到什么
requestAnimationFrame渲染循环与resize自适应
效果说明
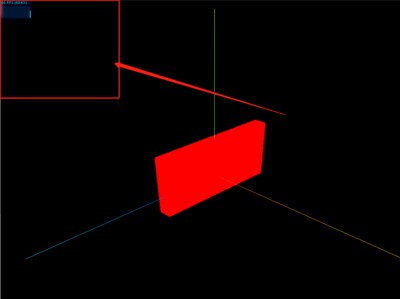
画面左上角(Stats 默认位置)出现 性能面板,显示当前帧率。场景为静态立方体 + rAF 循环。
核心概念
Three.js 内置示例常用的 Stats.js 提供三色面板:
| 面板 | 含义 | 切换 |
|---|---|---|
| FPS | 每秒帧数 | 默认 |
| MS | 每帧 CPU 耗时 | 点击切换 |
| MB | 内存占用 | 再点击 |
import Stats from 'three/examples/jsm/libs/stats.module.js';

const stats = new Stats();
document.body.appendChild(stats.domElement);

function render() {
    stats.update();  // 必须在 render 前调用
    renderer.render(scene, camera);
    requestAnimationFrame(render);
}
目标帧率: 桌面端 60 FPS;VR 需 90+;移动端 30~60 可接受。低于 30 用户会感知卡顿。
实现步骤
- 引入 Stats,append 到 DOM
- rAF 循环内
stats.update()→render
代码要点
import * as THREE from 'three';
//引入性能监视器stats.js
import Stats from 'three/examples/jsm/libs/stats.module.js';
// 场景
const scene = new THREE.Scene();// 创建场景
const geometry = new THREE.BoxGeometry(10, 60, 100); //几何体
const material = new THREE.MeshBasicMaterial({ color: 0xff0000 }); //材质
const mesh = new THREE.Mesh(geometry, material); //网格模型
mesh.position.set(0, 10, 0); //网格模型位置
scene.add(mesh);  //场景添加网格模型

// AxesHelper
const axesHelper = new THREE.AxesHelper(150);
scene.add(axesHelper);

// 相机
const camera = new THREE.PerspectiveCamera();  //相机
camera.position.set(200, 200, 200); //相机位置
camera.lookAt(0, 10, 0);   //相机观察位置

// 渲染器
const renderer = new THREE.WebGLRenderer(); // 创建渲染器
const box = document.getElementById('box');
renderer.setSize(box.clientWidth, box.clientHeight); //渲染区域
renderer.render(scene, camera); //执行渲染
box.appendChild(renderer.domElement);;


const stats = new Stats();
document.body.appendChild(stats.domElement);
function render() {
        stats.update();
        renderer.render(scene, camera); //执行渲染操作
        requestAnimationFrame(render); //请求再次执行渲染函数render,渲染下一帧
}
render();
完整源码:GitHub
小结
- 本文提供 帧率 完整 Three.js 源码与在线 Demo,建议先运行案例再改 uniform/参数做二次实验
- 更多 Three.js 实战案例见 three-cesium-examples 合集 与 GitHub 开源仓库