光线 · Light · ▶ 在线运行案例
案例合集: 三维可视化功能案例(threehub.cn)
开源仓库github地址: https://github.com/z2586300277/three-cesium-examples
**400个案例代码: ** 网盘链接
你将学到什么
- Scene / Camera / Renderer 标准渲染管线搭建
- 案例完整源码结构与可复用初始化模板
效果说明
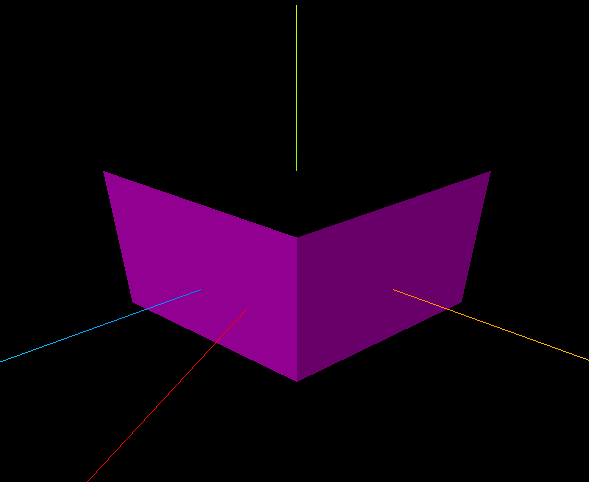
一个受光照影响的立方体,能看到明暗面;场景中还有 平行光辅助线(红色线段)指示光源位置与照射方向。
核心概念
材质与光照
| 材质 | 是否受光 | 典型用途 |
|---|---|---|
MeshBasicMaterial |
否 | UI、线框、不受光纯色 |
MeshLambertMaterial |
是(漫反射) | 哑光表面 |
MeshPhongMaterial |
是(漫反射+高光) | 塑料、金属感 |
MeshStandardMaterial |
是(PBR 物理) | 现代项目默认 |
本案例用 MeshLambertMaterial(无参数 = 默认白色),必须加光源才能看见。
光源类型
| 类型 | 特点 | 衰减 |
|---|---|---|
AmbientLight |
全局均匀照明,无方向 | 无 |
DirectionalLight |
平行光,模拟太阳 | 无 |
PointLight |
点光源,向四周发射 | 有 distance/decay |
SpotLight |
锥形聚光 | 有 angle/penumbra |
// 平行光 = 颜色 + 强度 + 位置(方向由 position 指向原点决定)
const light = new THREE.DirectionalLight(0xff00ff, 1.0);
light.position.set(100, 0, 200);
scene.add(light);
DirectionalLightHelper(light, size, color) 在场景中画出光源位置与目标方向的参考线,便于调试。
实现步骤
- 创建 Scene +
MeshLambertMaterial的 Mesh(受光材质) - 添加
DirectionalLight并设置 position - 添加
DirectionalLightHelper可视化 - AxesHelper + Camera + Renderer,一次性渲染
代码要点
import * as THREE from 'three';

// 1、影响哪些材质
//     不影响:MeshBasicMaterial(基础)
//     影像:  MeshLambertMaterial(漫反射)、MeshPhongMaterial(高光)、MeshPhysicalMaterial(物理)、MeshStandardMaterial(物理)

// 2、光源(分类、颜色、强度、衰减、位置)
//     PointLight(点光源)、SpotLight(聚光灯)、DirectionalLight(平行光)、AmbientLight(环境光)

// 场景
const scene = new THREE.Scene();// 创建场景
const geometry = new THREE.BoxGeometry(100, 100, 100); //几何体
const material = new THREE.MeshLambertMaterial(); //材质
const mesh = new THREE.Mesh(geometry, material); //网格模型
mesh.position.set(0, 10, 0); //网格模型位置
scene.add(mesh);  //场景添加网格模型

// AxesHelper
const axesHelper = new THREE.AxesHelper(150);
scene.add(axesHelper);

// ---------光源-----------
const directionalLight = new THREE.DirectionalLight(0xff00ff, 1.0); //颜色、强度
directionalLight.position.set(100, 0, 200);   //位置
scene.add(directionalLight); //点光源添加到场景中

// -----------光源参考线-----------
const dirLightHelper = new THREE.DirectionalLightHelper(directionalLight, 5, 0xff0000);
scene.add(dirLightHelper);

// 相机
const camera = new THREE.PerspectiveCamera();  //相机
camera.position.set(200, 200, 200); //相机位置
camera.lookAt(0, 10, 0);   //相机观察位置

// 渲染器
const renderer = new THREE.WebGLRenderer(); // 创建渲染器
const box = document.getElementById('box');
renderer.setSize(box.clientWidth, box.clientHeight); //渲染区域
renderer.render(scene, camera); //执行渲染
box.appendChild(renderer.domElement);
完整源码:GitHub
小结
- 本文提供 光线 完整 Three.js 源码与在线 Demo,建议先运行案例再改 uniform/参数做二次实验
- 更多 Three.js 实战案例见 three-cesium-examples 合集 与 GitHub 开源仓库