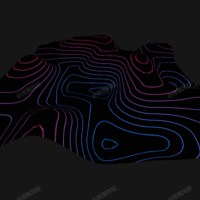
等高线 · Contour Line · ▶ 在线运行案例
案例合集: 三维可视化功能案例(threehub.cn)
开源仓库github地址: https://github.com/z2586300277/three-cesium-examples
**400个案例代码: ** 网盘链接
你将学到什么
- ShaderMaterial 自定义着色器实现核心视觉效果
- OrbitControls 相机轨道交互
- Canvas 动态纹理贴图
requestAnimationFrame渲染循环与resize自适应
效果说明
本案例演示 等高线 效果:用 Canvas 2D 绘制内容并实时映射为 Three.js 纹理;核心用到 ShaderMaterial、OrbitControls、Canvas。建议先打开文首在线案例查看动态画面,再对照下方源码逐步理解。
核心概念
- Scene / Camera / WebGLRenderer 构成最小渲染闭环;大场景可开
logarithmicDepthBuffer缓解 Z-fighting。 - ShaderMaterial 通过
uniforms+ 自定义 GLSL 控制逐像素/逐点效果;透明粒子常配合depthTest: false。 - OrbitControls 提供轨道旋转/缩放;开启
enableDamping后需在 animate 中controls.update()。 - CanvasTexture 每帧或按需把 2D Canvas 内容上传 GPU,适合动态文字、图表、视频帧贴图。
实现步骤
- 搭建 Scene、PerspectiveCamera、WebGLRenderer,挂载 canvas 并处理
resize - 定义 uniforms / onBeforeCompile 或 ShaderMaterial,编写 GLSL 与材质参数
- 创建 OrbitControls(及 Raycaster 等交互控件,若源码包含)
- 在
requestAnimationFrame循环中更新状态并 render(Cesium 为viewer.render或自动渲染)
代码要点
import * as THREE from "three";
import { OrbitControls } from "three/examples/jsm/controls/OrbitControls.js";
import { GUI } from "dat.gui";

const canvas = document.createElement("canvas");
canvas.style.width = "100vw !important";
canvas.style.height = "100vh !important";
document.body.appendChild(canvas);

const renderer = new THREE.WebGLRenderer({ canvas: canvas, antialias: true, alpha: true });
renderer.setClearColor(0x161616, 1);

const scene = new THREE.Scene();

const camera = new THREE.PerspectiveCamera(90, 1, 0.1, 1000);
camera.position.set(0, 26, 40);

const controls = new OrbitControls(camera, canvas);
controls.enableDamping = true;
// controls.maxDistance = 25;

class PerlinNoise {
  static noise(x, y) {
    const posIntX = Math.floor(x);
    const posIntY = Math.floor(y);
    const posFloatX = x - posIntX;
    const posFloatY = y - posIntY;

    const sx = PerlinNoise.cubicInterpolate(posFloatX);
    const sy = PerlinNoise.cubicInterpolate(posFloatY);

    const v00 = PerlinNoise.hash(posIntX, posIntY);
    const v10 = PerlinNoise.hash(posIntX + 1, posIntY);
    const v01 = PerlinNoise.hash(posIntX, posIntY + 1);
    const v11 = PerlinNoise.hash(posIntX + 1, posIntY + 1);

    const v0 = PerlinNoise.mix(v00, v10, sx);
    const v1 = PerlinNoise.mix(v01, v11, sx);
    return PerlinNoise.mix(v0, v1, sy);
  }

  static mix(a, b, t) {
    return a * (1 - t) + b * t;
  }

  static hash(x, y) {
    const dot = x * 12.9898 + y * 78.233;
    const value = Math.sin(dot) * 43758.5453;
    return value - Math.floor(value);
  }

  static cubicInterpolate(x) {
    return 3.0 * Math.pow(x, 2.0) - 2.0 * Math.pow(x, 3.0);
  }
}

class GroundGeometry extends THREE.PlaneGeometry {
  constructor(width, height, widthSegments, heightSegments) {
    super(width, height, widthSegments, heightSegments);

    this.rotateX(-Math.PI / 2);

    const attr_pos = this.attributes.position;
    for (let i = 0; i < attr_pos.count; i++) {
      const x = attr_pos.getX(i);
      const z = attr_pos.getZ(i);

      attr_pos.setY(i, PerlinNoise.noise(x * 0.1, z * 0.1) * 12.0);
    }

    this.computeVertexNormals();
  }
}

const ground_geo = new GroundGeometry(50, 50, 60, 60);
const ground_mat = new THREE.ShaderMaterial({
  uniforms: {
    // 高度范围
    range: {
      value: 12.0,
    },
    // 等高线宽度
    lw: {
      value: 0.1,
    },
    // 等高线段数
    ln: {
      value: 10,
    },
    // 背景色
    c_bg: {
      value: new THREE.Color(0x161616),
    },
    // 等高线颜色 0
    c_l_0: {
      value: new THREE.Color(0x01bbbff),
    },
    c_l_1: {
      value: new THREE.Color(0xff4199),
    },
    // 时间
    t: {
      value: 0.0,
    },
  },
  vertexShader: /* glsl */ `
    uniform  float  range  ;

    varying  vec3  vPos     ;
    varying  vec3  vNormal  ;

    void main() {
      vec3 pos = position;

      vPos = pos;
      vNormal = normalize(normal);

      gl_Position = projectionMatrix * modelViewMatrix * vec4(pos, 1.0);
    }
  `,
  fragmentShader: /* glsl */ `
    uniform  float  range  ;
    uniform  float  lw     ;
    uniform  float  ln     ;
    uniform  vec3   c_bg   ;
    uniform  vec3   c_l_0  ;
    uniform  vec3   c_l_1  ;
    uniform  float  t      ;

    varying  vec3  vPos     ;
    varying  vec3  vNormal  ;

    void main() {
      vec4 c_out = vec4(c_bg, 1.0);

      // 使用法线校正等高线绘制的范围,保证宽度一致
      float a = length(vNormal / vNormal.y);
      float c = a / sqrt(a * a - 1.0);
      float clw = lw / c;

      // 取高度值,并应用时间轴动画
      float h = vPos.y - t * 0.5;

      // 在范围 (Z + clw, Z + 1.0) 的范围内绘制
      if(fract(h) > 1.0 - clw){
        float d = abs(fract(h) - 1.0 + clw * 0.5) / clw;
        float v = 1.0 - pow(d, 1.6);
        c_out.rgb = mix(c_bg, mix(c_l_0, c_l_1, vPos.y / range), v);
      }

      gl_FragColor = c_out;
    }
  `,
});

const ground = new THREE.Mesh(ground_geo, ground_mat);
scene.add(ground);

const timer = new THREE.Timer();

const tick = (delta, elapsed) => {
  controls.update(delta);
  ground_mat.uniforms.t.value = elapsed;
};

const render = () => {
  renderer.render(scene, camera);
};

const ani = () => {
  const elapsed = timer.getElapsed();
  const delta = timer.getDelta();

  timer.update();

  tick(delta, elapsed);
  render();

  requestAnimationFrame(ani);
};

const data = {
  get range() {
    return ground_mat.uniforms.range.value;
  },
  set range(v) {
    ground_mat.uniforms.range.value = v;
  },
  get lw() {
    return ground_mat.uniforms.lw.value;
  },
  set lw(v) {
    ground_mat.uniforms.lw.value = v;
  },
  get c_l_0() {
    return `#${ground_mat.uniforms.c_l_0.value.getHexString()}`;
  },
  set c_l_0(v) {
    ground_mat.uniforms.c_l_0.value.set(v);
  },
  get c_l_1() {
    return `#${ground_mat.uniforms.c_l_1.value.getHexString()}`;
  },
  set c_l_1(v) {
    ground_mat.uniforms.c_l_1.value.set(v);
  },
};
const gui = new GUI();
gui.add(data, "lw", 0.01, 0.2, 0.001).name("宽度");
gui.addColor(data, "c_l_0").name("颜色0");
gui.addColor(data, "c_l_1").name("颜色1");

new ResizeObserver(() => {
  const rect = document.body.getBoundingClientRect();
  const w = rect.width;
  const h = rect.height;
  const a = w / h;
  const dpr = window.devicePixelRatio * 1.25;

  renderer.setSize(w, h, false);
  renderer.setPixelRatio(dpr);

  camera.aspect = a;
  camera.updateProjectionMatrix();
}).observe(document.body);

ani();
完整源码:GitHub
小结
- 本文提供 等高线 完整 Three.js 源码与在线 Demo,建议先运行案例再改 uniform/参数做二次实验
- 更多 Three.js 实战案例见 three-cesium-examples 合集 与 GitHub 开源仓库